Are Mattress Toppers Good Or Bad For Your Back

Are Mattress Toppers Good Or Bad For Your Back

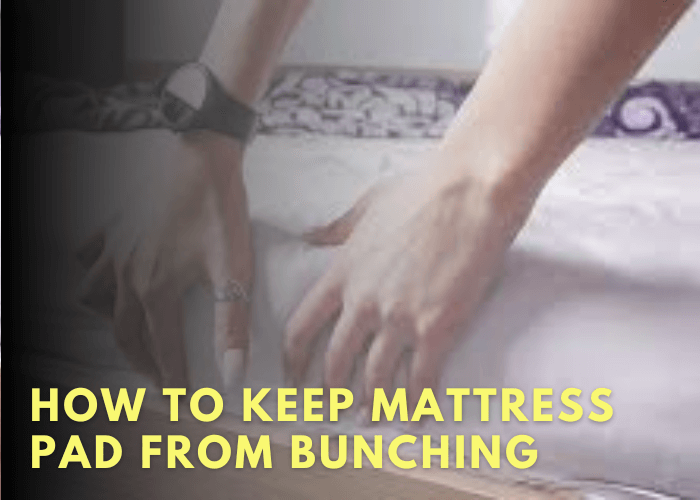
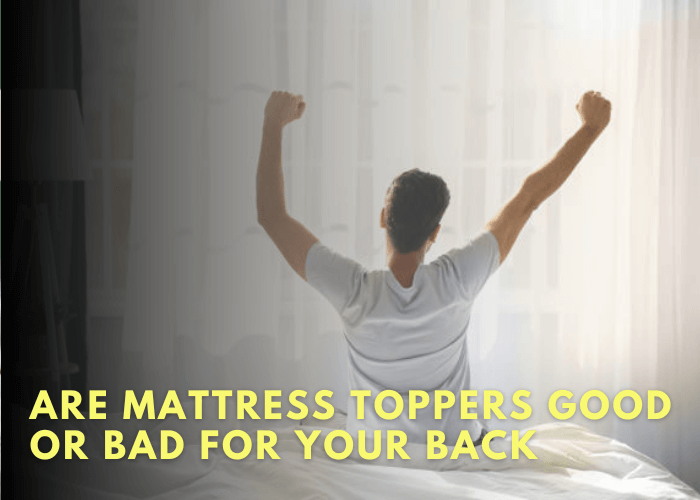
Does a mattress topper make his back feel better or worse?

That’s what this article will explore: 

  • Are mattress toppers good or bad for your back? 
  • Different types of toppers.
  • Alternatives to improve sleep quality.

Could mattress toppers really be the answer he was looking for?

Benefits Of A Mattress Topper For Back Pain

1 58

To start off, mattress toppers offer targeted support that relieves pressure points and improves spinal alignment. 

This helps prevent or relieve back pain and aches as it reduces tossing and turning at night. 

Furthermore, these toppers are available in different materials like memory foam and latex which provide varying levels of firmness and contour to meet individual needs.

From softer mattresses that alleviate joint pain to firmer ones that reduce motion transfer, mattress toppers can help you get the sleep you need for better health and wellbeing. 

What’s more, they are also easy on the wallet when compared with buying a new mattress altogether.

With all these advantages in mind, it is clear why people find them attractive – they give you the best of both worlds: comfort without sacrificing quality support. 

And while we’ve discussed how they benefit one’s back health, let’s take a look at some potential drawbacks next.

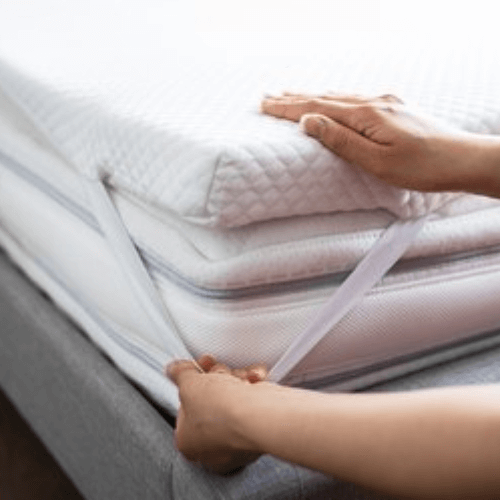
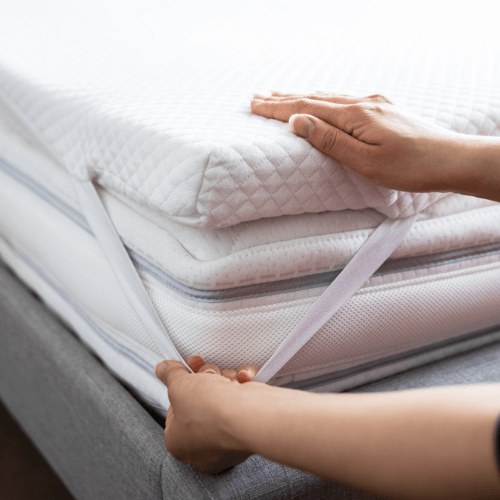
Types Of Mattress Toppers

1 56

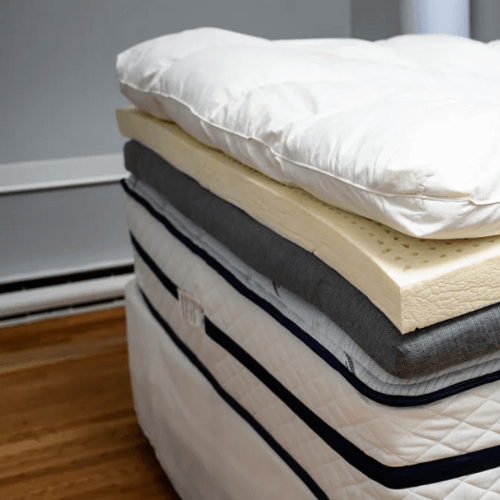
Mattress toppers can be a great way to bring support and comfort to an existing mattress. But with so many types available, it can be difficult knowing which one is right for you. 

Let’s explore the different types of mattress toppers and what they have to offer.

Memory foam is a popular choice among those looking for relief from back pain. It contours to the body, providing support where needed while also cushioning pressure points. 

Latex is another popular option because it’s naturally cooling, breathable and responsive. It gives a firmer feel than memory foam while still offering some cushioning.

Polyester fiberfill provides cushioning without conforming too closely to the body, which can make it easier for those who move around in their sleep. 

Wool is also an option that offers a gentle cushioning effect, though it tends to be more expensive than other materials.

No matter which type you choose, look for something that offers good support and comfort for your needs. 

That way you’ll get the most out of your mattress topper and ensure you’re getting quality rest each night.

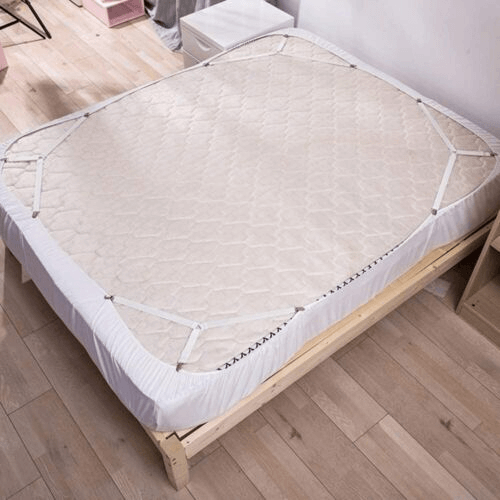
What To Look For When Purchasing A Mattress Topper

When it comes to mattress toppers, one size doesn’t fit all. It’s important to consider a few factors before making a purchase. Here are the things you should look for when buying a mattress topper.

First, decide on the type of padding you prefer. If you want extra comfort, go for down-filled or memory foam options; if you’re looking for support, choose latex or egg crate styles. 

Then, think about the thickness of the material – thinner ones tend to last longer but thicker ones provide more cushioning and support. 

Finally, determine your budget and make sure your chosen topper fits it.

You’ll also want to check the density and firmness ratings of any mattress topper you buy so that it suits your sleeping needs and preferences. 

This is especially true if you have back problems; look for models with higher densities and firmer ratings that provide better support.

Before committing to a purchase, read customer reviews – they can give you an idea of how well the product performs in real life scenarios and help inform your decision-making process. 

Does A Mattress Topper Impact Sleep Quality?

2 56

As the adage goes, “better sleep means better health”. So, does a mattress topper impact sleep quality? The answer is yes. 

A mattress topper can improve the quality of your sleep by providing extra cushioning and support for your back and body.

Mattress toppers come in various shapes and sizes, from memory foam to gel-infused foam. 

They provide an extra layer of comfort that can help reduce pain or discomfort while sleeping on a firm mattress. 

Additionally, they can reduce pressure points and make it easier to move around during the night without feeling stiff or sore in the morning.

The added cushioning and support provided by a mattress topper can also help you get more restful sleep. 

It may even help you fall asleep faster as well as stay asleep longer due to its contoured shape that conforms to your body’s curves. 

Ultimately, using a mattress topper can be beneficial for overall sleep quality since it helps promote healthy posture while you snooze.

The right mattress topper will offer both comfort and support for your body while sleeping – something that’s essential if you want good quality sleep. 

What To Do If A Mattress Topper Does Not Improve Back Pain

Back pain is a common problem for many people. A mattress topper may be a way to help relieve this issue. But what if it doesn’t?

The first step is to evaluate the mattress itself and see if it’s providing enough support. If not, then replacing the mattress may be necessary. 

Also consider the firmness of the bed, as too soft or too hard may cause tension in the back muscles.

Look into other methods that can provide relief such as massage therapy, stretching exercises, physiotherapy or acupuncture. 

Don’t discount lifestyle changes either; reducing stress and incorporating regular physical activity can improve your overall health and reduce discomfort.

These are all important steps that should be taken if a mattress topper does not improve back pain.

Alternatives To A Mattress Topper For Back Pain

If a mattress topper doesn’t help your back pain, there are alternatives. Here’s what you can try:

  1. Start with exercises. Simple stretches and core strengthening can be done at home and are often the best way to manage back pain. This includes basic yoga poses, planks, and other bodyweight exercises.
  2. Try a different sleep position. If you normally sleep on your back, try sleeping on your side or stomach instead. This may help align your spine better and reduce discomfort.
  3. Look into ergonomic mattresses, pillows, and bedding. Ergonomically designed products support your body in specific ways that help reduce strain on your spine while you sleep.

These are all helpful ways to improve back pain without resorting to a mattress topper. But if none of these work for you, then it might be time to see a doctor who can recommend treatment options more tailored to your individual needs. 

From there, you can figure out what works best for relieving your back pain and getting a good night’s rest.

Frequently Asked Questions

How Thick Should A Mattress Topper Be To Help With Back Pain?

Back pain is a common issue for many people. A mattress topper can be a great way to alleviate some of the symptoms associated with back pain.  But it’s important to know how thick the mattress topper should be for maximum benefit.

The thickness of your mattress topper will depend on personal preference and existing level of comfort. For example, if you already have a relatively comfortable mattress, then a thinner mattress topper may be more suitable. 

If you’re dealing with more severe back pain, then a thicker mattress topper may be better-suited for giving your body some extra support while sleeping. In general, between 2 and 4 inches is considered ideal for helping with back pain.

Whether you go with a thicker or thinner option, make sure that the materials used in the topper are breathable and able to contour your body shape effectively when lying down. 

Consider getting advice from an expert before making any purchasing decisions so that you can get the most out of your investment in terms of comfort and support while sleeping.

Conclusion

The verdict is in: mattress toppers can be great for back pain. Depending on the type, thickness, firmness, and material of the mattress topper, it can drastically improve your sleep quality and reduce back pain.

It’s truly a miracle that something so simple can have such an immense effect on our bodies.

But there are still a few things to consider before purchasing a mattress topper. 

Make sure you know exactly how long it will last and that you’re getting the right thickness and firmness level for your needs. 

Don’t skimp on quality either; high-end materials are worth every penny when it comes to your health.

In short, mattress toppers are like a godsend for those with back pain! 

They provide unparalleled comfort and support while helping us get the restful sleep we need. 

It’s an investment that pays off in spades – literally life-changing if you suffer from chronic back pain!

How To Keep Mattress Pad From Bunching

How To Keep Mattress Pad From Bunching

Have you ever woken up in the middle of the night to find your mattress pad bunched and twisted beneath you? 

It’s an uncomfortable feeling that can ruin a good night’s sleep. 

The biggest challenge with keeping your mattress pad from bunching is making sure it fits properly. If it’s too big or too small, it won’t stay in place no matter what you do. Measure your mattress and make sure you buy a pad that matches those dimensions exactly. 

That way, it won’t move around as much when you toss and turn during the night.

Finally, be sure to tuck the edges of the mattress pad securely underneath your mattress before putting on the sheets. This will help hold everything in place and prevent any slipping or slipping throughout the night. 

With these tips, you’ll be able to enjoy a peaceful slumber without worrying about bunching or discomfort!

Let’s look at some more points…

1. Choosing The Right Mattress Pad

1 56

Choosing the right mattress pad is like a puzzle with many pieces. You must consider factors like size, material, and thickness. 

Achieving the perfect fit for your bed can be tricky, but you’ll get there if you take it step-by-step.

Start by measuring your mattress from all sides to get an accurate size. 

Then measure out enough material to cover the mattress with a few inches of extra fabric. 

This will ensure that you have enough fabric to tuck under all four corners and avoid bunching in the middle of your bed.

Now that you’ve got the right size, you can move on to materials and thickness. Choose something breathable and lightweight if you prefer a cooler sleeping experience. 

For those who like a bit more cushioning or warmth, go with something thicker like memory foam or down feathers. 

The key is finding the right balance between comfort and support so that your mattress pad won’t bunch up when you use it.

2. Measuring And Cutting Mattress Pad

Believe it or not, measuring and cutting a mattress pad isn’t as daunting as it may sound. 

Sure, you might feel like you’re in over your head at first, but with the right tools and know-how, you’ll be on your way to having a perfectly fitted mattress pad in no time. Here’s how to do it:

  1. Get your trusty tape measure out and measure the length, width, and depth of your mattress. It’s important to get an accurate measurement so that the mattress pad will fit properly.
  2. Cut the mattress pad to size using scissors or a sharp knife. If you don’t have either of these tools handy, ask someone who does. Taking extra caution when doing this step is key!
  3. Once the mattress pad is cut to size, make sure all four sides are even. This will give the pad a nice appearance while keeping it from bunching up when placed on top of the mattress.

Now that your mattress pad has been measured and cut correctly, there’s only one thing left to do: secure it onto the bed. 

With just a few simple steps, you can keep your mattress pad from bunching up for good!

3. Securing Mattress Pad To Bed

2 55

Secure the mattress pad to the bed. It’s important it stays in place. 

Start by laying the mattress pad on the bed, face-down. Make sure it fits properly and is flat. Then turn it over so you can see the underside of the mattress pad. 

Now comes the tricky part: You’ll need to use staples or tape to secure it to the bed. 

It takes a bit of patience and skill, but if you take your time, you should be able to do this without any problems.

If using staples, make sure they are evenly spaced and are placed carefully so as not to damage the fabric or create lumps or bumps in the mattress pad. If using tape, use double-sided tape for best results. 

Place strips of tape around all four corners, then continue along all four sides at regular intervals. Make sure that each piece of tape overlaps with an adjacent piece slightly when you apply them for extra security.

Once all four sides have been secured with staples or tape, give your work a final inspection to check for any gaps or loose ends where air could escape from underneath and cause bunching up of your mattress pad later on. 

4. Anchoring Mattress Pad With Straps

Straps provide an alternative way to keep your mattress pad from bunching. 

Place them across the corners of the mattress, and then secure them to the bed frame. This will help to keep your pad in place and reduce slipping or shifting. 

It’s a simple solution that won’t cost you much either.

You’ll want to choose straps that are strong enough to hold your mattress pad securely in place. 

Look for straps made of heavy-duty material like nylon or canvas webbing, which won’t stretch or tear easily. And make sure they’re wide enough so they don’t dig into your mattress pad.

When attaching the straps, use a secure knot that won’t come undone with movement. Loops are ideal for this as they can be tightened if needed and won’t slip off easily either. 

5. Utilizing Mattress Grippers

3 47

Mattress grippers are easy to install and use. They come with adhesive backing that sticks to the bottom of the mattress pad and bed frame. 

Many models also include straps or clips for additional security. 

Once installed, they keep the mattress pad from shifting or bunching up during sleep.

Using a mattress gripper is a great way to prevent bunching and make sure your mattress pad stays in place all night long. 

It’s also an economical option since they’re very affordable compared to other solutions like non-slip pads or sheets. 

With these features, it’s no wonder why so many people turn to them for their bunching issues. 

6. Adding Non-Slip Pads

One way to do this is by adding non-slip pads.

Non-slip pads come in a variety of sizes and shapes and can be found at most home goods stores. 

They are designed to stick underneath the mattress pad and stop it from shifting when you move around during the night. 

It’s an inexpensive solution that can save you from many hours of discomfort.

7. Replacing Mattress Pad Regularly

Replace your mattress pad regularly for a better night’s sleep.

Ensuring that your mattress pad fits snugly on top of your mattress can prevent bunching or shifting during the night. 

However, even if you buy the perfect size and secure it with non-slip pads, over time it may stretch out or wear down due to regular use. 

To prevent bunching or discomfort, replace your mattress pad every 3-4 months or so.

When buying a new mattress pad, consider factors such as material breathability and fill type. 

Look for materials that are soft yet durable and can stand up to regular washing – such as cotton, wool or memory foam – for a more comfortable sleep experience. 

To keep things simple, opt for machine washable options so you can keep them clean and fresh without too much effort.

#038;autoplay=0&cc_load_policy=0&cc_lang_pref=&iv_load_policy=1&loop=0&modestbranding=0&rel=0&fs=1&playsinline=0&autohide=2&theme=dark&color=red&controls=1&" class="__youtube_prefs__ epyt-facade epyt-is-override no-lazyload" data-epautoplay="1" >YouTube player

Frequently Asked Questions

How Often Should I Replace My Mattress Pad?

When it comes to your mattress pad, it’s like having a best friend. It’s always there for you, cradling and protecting you in the night. But just like any friendship, sometimes your mattress pad needs a little love and care – or even replacement. So how often should you replace it?

It’s important to remember that mattress pads are not designed to last forever. Depending on the quality and the frequency of use, they may need replacing every 1-2 years. However, if you want to keep yours from bunching up, here are some tips: 

1. Make sure your bedding is fitted correctly – this means measuring your mattress before buying sheets or duvets so they fit properly. 
2. Wash your sheets and mattress pad regularly – this will help keep them fresh and free of dirt or allergens that can cause bunching. 
3. Avoid using fabric softener or dryer sheets when washing – these can make fabrics stiffer over time which can lead to bunching.

Replacing your mattress pad may seem like an unnecessary expense but it could save you from sleepless nights caused by lumpy fabric. 

Not only that, but investing in a good quality mattress pad can help protect your mattress from wear and tear – something that is well worth the cost in the long run!

Are Mattress Grippers The Only Way To Keep My Mattress Pad In Place?

Are mattress grippers the only way to keep my mattress pad in place? That’s a great question. There are plenty of ways to make sure your mattress pad stays put and doesn’t bunch up. 
Here are four of the most effective solutions:

1. Mattress Grippers: These devices attach to the corners of your bed and create an extra layer of security for your mattress pad. They grip the sides, preventing it from slipping off or bunching up.
2. Sheets with Elastic Edges: Investing in high-quality fitted sheets with elastic edges will help keep your mattress pad in place and prevent it from bunching up underneath you.
3. Heavy Blankets: Placing heavy blankets on top of your mattress pad can also keep it secure and prevent it from slipping around or bunching up during the night.
4. Safety Pins: If all else fails, you can use safety pins to fasten down any areas that might be prone to bunching up on your mattress pad.

No matter what option you choose, a little bit of effort goes a long way when it comes to keeping your mattress pad in place! 
Taking these steps ensures that you get a good night’s sleep without worrying about uncomfortable bunches or lumps underneath you throughout the night.

How To Clean A Mattress Topper Complete Guide For All Materials

How To Clean A Mattress Topper Complete Guide For All Materials

We spend more than half of our lives sleeping, yet many people don’t realize the importance of regularly cleaning their mattress toppers. 

In fact, the average person spends up to one-third of their life in bed and it’s estimated that the average adult sheds 1.5 grams of skin flakes a day while sleeping! 

When it comes to mattress toppers, there are a variety of materials available on the market today – from memory foam to wool and latex – each with its own specific cleaning instructions. 

That’s why it’s important to know what material you have before you start cleaning! 

Here, we’ll provide an easy-to-follow guide so you can make sure your mattress topper is hygienic and safe for sleep.

Understand The Type Of Topper

1 52

It’s like cleaning up after a party where no one tells you what happened. You’re not sure what kind of mess you have to deal with, and it can be overwhelming. 

That’s the feeling when trying to figure out how to clean your mattress topper.

The first step is understanding the type of mattress topper you have. 

It could be synthetic or natural material, like bamboo or wool. 

Each type of material has its own unique cleaning requirements, so you need to know which one you have before starting the process.

In some cases, you may need special cleaning supplies or techniques depending on the material. 

For example, some natural materials require either dry-cleaning or a gentle hand-washing rather than machine washing. 

Knowing this information ahead of time will save you time and hassle in the long run. 

Plus, it ensures that your mattress topper will stay in great condition for years to come.

No matter what type of mattress topper you have, gathering the right supplies is essential if you want a successful cleaning job.

Gather The Necessary Cleaning Supplies

2 51

Tackling the task of cleaning a mattress topper can be daunting, but with the right supplies and approach, you can easily have your mattress looking good as new. 

To help make this task easier, here’s a guide on the necessary steps to take.

Gathering up all the required supplies is a great place to start. 

To make sure you’re equipped with all that you need to perform a thorough cleaning, here’s a list of items you should have: 

  1. Vacuum cleaner
  2. Sponge 
  3. Mild laundry detergent
  4. Clean cloths and towels.

With these useful items in hand, you’ll be able to go through the process without missing any steps. 

In addition, it’s best to use products that are mild and non-abrasive so as not to damage your mattress in any way. 

All these components will ensure that your mattress remains crisp and clean for years to come.

Now that everything is ready at your disposal, it’s time to get started on pre-treating the mattress before giving it its final deep clean.

Pre-Treat The Topper

Tackling a mattress topper cleaning project can be like taming a wild beast – it’s often an intimidating, daunting task. 

But with the right approach, cleaning a topper doesn’t have to be difficult. 

Step three is pre-treating the topper.

Start by mixing a solution of mild detergent and warm water. 

Then, using a soft cloth or brush, gently scrub the surface in circular motions. 

Don’t forget to use extra care for delicate surfaces like featherbeds and latex foam models. 

Once you’ve finished scrubbing, let the solution sit for ten minutes before rinsing off with lukewarm water.

After that, blot up any remaining moisture with a towel or cloth. It’s important not to press too hard as this can damage the material and/or leave marks on the fabric. 

Instead, focus on dabbing gently until all wetness is removed. 

With that done, your mattress topper is ready for the next step: vacuuming its surface.

Vacuum The Surface

Vacuuming the surface of the mattress topper is essential for removing any dirt or dust that may have settled in. To do this properly, you’ll need to follow these steps: 

  • Gather a vacuum cleaner with an upholstery attachment. 
  • Vacuum from top to bottom in small, overlapping strokes. 
  • Move the vacuum back and forth slowly over the topper for thorough cleaning. 
  • Finish with one more pass over the entire mattress topper using gentle strokes. 

This task should be done regularly – at least once a month – to prevent dirt and dust buildup over time. 

Vacuuming helps extend the life of your mattress topper by removing allergens as well as dirt, dust mites and other particles that can cause damage if left unchecked. 

Plus, it’s quick and easy! 

After vacuuming, move on to spot cleaning any stains on the mattress topper before giving it a full deep clean.

Spot Clean Stains

3 43

Spot cleaning stains is the next step in cleaning a mattress topper. If you see any discolorations or marks on the surface, treat them immediately. 

You don’t want the stain to set in and become harder to remove. 

Start by blotting up any moisture with a clean, dry cloth. Then apply a small amount of detergent directly onto the stain and rub it gently with a sponge. 

Once done, rinse off with clean water and pat dry with a cloth.

When spot cleaning, it’s important to use only mild detergents that won’t damage the material of your topper. 

Always test it on an inconspicuous area first before applying all over the mattress. 

Check your manufacturer’s guidelines too, as some materials are not suitable for certain products.

Remember not to scrub too hard when spot cleaning as this might damage or tear the fabric of your mattress topper. 

Gently dab and press until the stain is removed instead of scrubbing vigorously. 

TIP: For tougher stains, consider using baking soda or white vinegar—both are natural ingredients that can help lift away dirt without damaging fabrics!

Wash And Dry The Topper

Once you’ve begun to tackle the task of cleaning your mattress topper, it’s time for the final stretch. 

Washing and drying the topper is like the finishing touches on a masterpiece. 

A few simple steps can make all the difference in achieving a clean and comfortable sleep.

To begin, collect your materials: detergent, bleach (if needed) and a washing machine large enough to accommodate your mattress topper. 

Next, combine the detergent and bleach in hot water according to the instructions on each product. 

Place your mattress topper into the washing machine and let it run its cycle.

When finished, remove from washer and place directly into dryer. 

Dry using a low-heat setting for best results. If possible, add a couple of tennis balls or other soft objects into the dryer with the mattress topper; this helps fluff up any clumps that may have formed during laundering process. 

Once complete, you’re ready to move onto refreshing and deodorizing your newly-cleaned mattress topper!

Refresh And Deodorize The Topper

Ah, the joys of a freshly-cleaned mattress topper! Who wouldn’t love having one? Well, if your topper is in need of some TLC, you’ve come to the right place. 

We’ll show you how to refresh and deodorize it in no time.

Refreshing your mattress topper isn’t exactly rocket science. You just need some baking soda and an hour or two of your time. 

Sprinkle baking soda generously on top of the surface and leave it for about an hour so that any odors can be absorbed by the baking soda. 

Then vacuum up all the baking soda with a handheld vacuum cleaner or use a brush attachment on your vacuum cleaner. 

That’s all there is to it!

If you want to take things a step further, you can try using essential oils as well. 

Just put a few drops of your favorite essential oil on top of the mattress topper before sprinkling with baking soda for an added layer of freshness and aroma. 

The end result will be a mattress topper that smells great and looks like brand new!

So there you have it – easy peasy ways to refresh and deodorize your mattress topper without breaking a sweat. 

Time now for fluffing and rotating it for maximum comfort and extended life span!

Fluff And Rotate The Topper

At this point, you may be thinking that your mattress topper is clean. 

But don’t forget the last step: fluffing and rotating it! It’s an essential part of keeping your mattress topper in top condition.

Fluffing your topper means giving it a good shake or beating with a tennis racket, which helps redistribute the filling material and prevent clumping. 

Rotating it means flipping and turning it over every now and then so that all parts of the topper experience even wear and tear. 

This makes sure it doesn’t form creases or dips where you sleep.

Doing this regularly takes just a few minutes, but it can extend the life of your mattress topper significantly. 

So, don’t neglect this step – you’ll thank yourself later! 

After fluffing and rotating, move on to storing your mattress topper properly for optimal care.

Store The Topper Properly

To ensure your mattress topper continues to provide you with a comfortable sleep, it’s important to store it properly. 

The way you do this can vary depending on the materials used in the topper.

Just like an old-fashioned campfire, when stored correctly, your mattress topper will last much longer. 

Take the time to store it right and you’ll be rewarded with a comfy night’s sleep for years to come.

When not in use, keep your mattress topper away from extreme temperatures or direct sunlight. 

This will help keep the material from deteriorating and extend the life of the product. 

It is also a good idea to invest in a mattress protector or mattress bag that can be zipped up and kept clean. 

Doing so will help protect your mattress from dust mites, pet dander, and other allergens that could lead to respiratory problems if left unchecked. 

With these simple steps taken care of, you’ll be able to enjoy your mattress for years without having to worry about replacing it anytime soon.

Consider Professional Cleaning

Ahh, the feeling of a freshly cleaned mattress topper! It’s like being wrapped up in a hug from your favorite fuzzy blanket. 

But getting there can be tricky–especially if you don’t know what you’re doing. That’s why we’re here to help.

Professional cleaning is another option for those who are looking for an extra deep clean and want their mattress topper looking fresh and pristine again. 

Here are four reasons why you should consider professional cleaning services:

  1. Professionals have the right equipment to clean your mattress topper properly without damaging it.
  2. They can remove stains that regular cleaning methods may not remove.
  3. Expert cleaners know what products and processes to use for different materials and fabrics, so they won’t damage your mattress or its coverings.
  4. Professional cleaners also have access to special detergents that leave your mattress in perfect condition, free of harmful bacteria and allergens.

When it comes to choosing a professional cleaner, make sure they are experienced, certified, and insured – these factors will all contribute towards giving you peace of mind when it comes time for the job at hand. 

#038;autoplay=0&cc_load_policy=0&cc_lang_pref=&iv_load_policy=1&loop=0&modestbranding=0&rel=0&fs=1&playsinline=0&autohide=2&theme=dark&color=red&controls=1&" class="__youtube_prefs__ epyt-facade epyt-is-override no-lazyload" data-epautoplay="1" >YouTube player

Frequently Asked Questions

How Often Should I Wash My Mattress Topper?

It is recommended to wash your mattress topper at least every 6 months. 
According to a survey conducted by the National Sleep Foundation, 91% of people reported that they clean their bedding items, including mattresses, on a regular basis.

It’s important to properly clean your mattress topper in order to keep it in good condition and extend its life. 
Generally speaking, you should use a mild detergent or spot-cleaner with warm water when washing any fabric or foam mattresses and mattress toppers. 

You can also use an upholstery cleaner for more difficult stains. 
Avoid using strong chemicals as it could damage your mattress topper. If you’re unsure how often you should be cleaning your mattress topper, it’s best to start out at least every six months and then adjust as needed. 

Washing it more frequently will help improve the lifespan of your mattress topper and ensure that you’re sleeping on a clean surface free from dirt and dust mites. With proper care, your mattress topper will last longer and provide better comfort while you sleep.

Is It Safe To Dry Clean My Mattress Topper?

It’s a common question – is it safe to dry clean a mattress topper? Many people think that the harsh chemicals used in dry cleaning can damage the fabric, but is this true? 
Let’s investigate.

Studies have revealed that while certain fabrics may be slightly weakened by dry cleaning, if done correctly, this type of cleaning has no negative effects on the material. 
In fact, it can actually help prolong the life of your mattress topper. 

The key is to use a reputable dry cleaner who knows their stuff and won’t use a harsh chemical cleaner – they should also use gentle agitation when washing.

So, you can feel confident that if you choose to take your mattress topper to be dry cleaned, it won’t be damaged or weakened in any way. All you need is a good cleaner and you can rest easy knowing your bedding will remain in top condition for years to come.

What Is The Best Way To Remove Odors From A Mattress Topper?

Irony and sarcasm aside, it’s not the most pleasant smelling situation when you find that your mattress topper has taken on a certain odor. The question then becomes, how do you get rid of it? Well, we have just the guide for you.

Your first step should be to use an enzyme cleaner. These are designed to break down organic matter, which is what odors are made of. Just be sure to follow the instructions on the package as some may require a damp cloth for wiping as opposed to spraying directly onto the mattress topper.

Next, you can try sprinkling baking soda over your mattress topper and leaving it there for at least 24 hours before vacuuming it up. This will help draw out any lingering odors from deep within the fibers. 

You can also consider using essential oils or fabric refreshers if the smell persists after vacuuming up the baking soda.
No one likes dealing with stinky smells coming from their bedding, but with a few simple steps you’ll be on your way to breathing easy in no time!

Can I Use A Steam Cleaner To Clean My Mattress Topper?

Steam cleaners can be a great way to clean a mattress topper. It’s an effective way to deep-clean the material and get rid of dust, dirt and bacteria. But can it be used on all types of materials?

It’s important to check the care instructions for your mattress topper before using a steam cleaner. Some materials, like memory foam, are too delicate for steam cleaning and could be damaged if exposed to the high temperatures. 

But some materials such as latex or cotton may have no problem with steam cleaning. So, when looking at how to clean your mattress topper, it’s important to consider what type of material you have before using a steam cleaner. 

If in doubt, use other methods such as vacuuming or spot-cleaning with detergent instead. Doing this will ensure you don’t damage your mattress topper while trying to keep it clean.

Conclusion

It’s essential to keep your mattress topper clean. Regular washing and maintenance can extend its life and ensure that you get the most out of it. 

After all, a good night’s sleep is worth it.

It’s important to make sure your mattress topper is kept in top condition. 

Follow our guide for tips on how often you should wash it, what materials to use, and what other cleaning methods are available like steam cleaning or dry cleaning. 

With proper care, you’ll be able to enjoy the comfort of your mattress topper for years to come.

What Bed Size Is Best For Couples

What Bed Size Is Best For Couples

What size bed is best for couples? 

It’s a dilemma many face when considering how to furnish their bedroom. Do you take up the extra space with a king or queen-sized bed, or go with something more modest like a full or twin? 

It can be hard to decide which option is best for you and your partner.

Most people choose a king-sized bed, which provides more than enough rome for two sleepers. 

Fortunately, there are several factors to consider when making this decision. Comfort, budget, and room size all come into play as you determine which bed size will work best for your needs. 

This article will explore each factor so you can make an informed decision about which type of bed is right for you and your partner.

Understanding Bed Sizes And Dimensions

1 48

Bed sizes can be confusing. 

Measurements vary by country and retailer, so it’s important to know the dimensions you’re looking for. 

A quick overview: 

  • Twin size bed is 39 inches wide and 75 inches long.
  • Full size bed is 54 inches wide and 75 inches long.
  • Queen size bed is 60 inches wide and 80 inches long. 
  • King size bed is 76 inches wide and 80 inches long.
  • California king is 72 inches wide and 84 inches long.

Couples need to decide which of these sizes best fits their needs. The width of the bed matters most in determining how much space two people have when sleeping side-by-side. 

If both members are smaller framed, then a full or queen might work well; if one partner is larger than the other, then consider a king size bed instead.

Choosing a queen size mattress offers many advantages – couples get 30 more inches of space than they would on a full-sized model, plus extra room to move around while sleeping or cuddling up together without feeling cramped. 

Plus, it still fits comfortably in most master bedrooms.

Advantages Of A Queen Size Bed

If you’re searching for the perfect bed size for a couple, look no further than a queen size bed! This amazing bed is so much more than just a piece of furniture – it’s the ultimate in comfort and convenience. 

It’s simply unbeatable when it comes to accommodating two people with its generous proportions and roomy sleeping space. 

In fact, a queen size bed is practically essential for couples!

Let’s take a closer look at the advantages of having one in your bedroom. 

Firstly, the sheer size of a queen-size mattress means that two people can sleep comfortably without feeling cramped or overcrowded. 

With dimensions of 60″ x 80″, there’s plenty of room to roll around and get comfortable. 

What’s more, you won’t have to worry about fighting over blankets or pillows – there’ll be enough room for everyone!

Finally, a queen-size bed also looks great in any bedroom. Its classic design makes it an attractive addition to any décor style – from modern minimalism to traditional elegance. 

Not only does it look great, but its large size also means that you can fit other furniture items around it – like nightstands for extra storage and lamps for reading in bed.

So if you’re looking for the best bed size for couples, then look no further than the queen-size mattress – an unbeatable combination of comfort and convenience!

Disadvantages Of A Queen Size Bed

2 48

The queen size bed is a popular choice for couples, but it comes with its own set of drawbacks. Like a hazy dream, the disadvantages of this bed can appear in clear sight. 

Here are four key issues to consider before investing in a queen size:

  1. Cost: A queen size bed costs more than smaller-sized options, such as a full or twin.
  2. Space: A queen takes up more room than other beds, making it difficult to fit into tight spaces or small rooms.
  3. Support: With only one mattress, the support provided to each partner isn’t equal or customized to their needs.
  4. Movement: Without two mattresses, partners may be disturbed by each other’s movements during sleep, like tossing and turning or snoring.

Despite the popularity of a queen size bed for couples, the drawbacks make it less appealing than some other options available on the market. 

The cost and space requirements often make buyers pause before purchase while the lack of support and potential for disturbance make it less desirable than others when sleeping soundly is desired. 

It’s time to move on to bigger and better things – let’s look at the advantages of a king size bed!

Advantages Of A King Size Bed

Many couples are choosing larger beds to sleep in. In fact, 33% of couples choose a king size bed over any other size. 

The advantages of a king size bed make it the perfect choice for sleeping as a couple.

For starters, a king size bed provides plenty of space for two people to sleep comfortably without feeling cramped or crowded. This is especially important if you or your partner tend to move around in your sleep. 

Additionally, a king size bed will allow both partners to have personal space while still being able to cuddle and enjoy physical contact.

A king size bed also has aesthetic benefits, as it can be used to create a luxurious and sophisticated look in the bedroom. 

Plus, this type of bed typically comes with more storage options than other sizes, making it ideal for couples who need extra storage room for blankets and other items.

These benefits make it clear why so many couples are opting for a king size bed when shopping for their bedroom furniture. 

This type of bed offers plenty of space and comfort, as well as an elegant appearance that adds a touch of luxury to any bedroom. 

With its advantages clearly outweighing its disadvantages, there’s no doubt that this type of bed is the perfect option for couples looking for an ideal sleeping experience.

Disadvantages Of A King Size Bed

The king size bed is often lauded as the perfect sleeping solution for couples, but there are a few drawbacks to consider. 

Despite its many advantages, this larger bed may not be the best fit for all. 

Common concerns include cost considerations, space constraints, and uncomfortable design features.

Cost can be a major factor when purchasing a king size bed. 

The initial price tag can be hefty, due to both the larger frame and mattress size. 

Furthermore, certain luxuries such as adjustable bases or memory foam mattresses may add even more to the cost. In addition, sheets and bedding for these beds can also be pricier than standard sizes.

Space issues can also present difficulties when deciding on a king size bed. It is essential to measure out any room in which the bed will fit before purchase, as some rooms may not accommodate its large dimensions. 

People must also make sure that they have enough clearance when opening doors or windows while the bed is in place. 

Similarly, it’s important to consider how much space will be available after the installation of the bed – making sure to leave room for other furniture pieces and activities within the bedroom such as yoga or reading.

Finally, some people may find certain aspects of a king size bed uncomfortable or inconvenient. 

For instance, couples may find themselves too far apart from each other during sleep due to their increased distance on the mattress – especially if either partner moves around during their slumber. 

Additionally, depending on how it is designed, couples may find that one side of the mattress is higher than another – making it difficult to get comfortable throughout their sleep cycles.

When considering whether a king size bed is right for couples, it’s important to weigh carefully both its advantages and disadvantages before making any final decisions.

Advantages Of A California King Size Bed

3 40

A california king size bed is the ultimate comfort for couples who want to drift off into dreamland. 

It’s like a luxurious escape from reality, providing a sanctuary of relaxation and luxury. Here are its benefits:

  • Roomier than a standard king size bed: A california king size bed is longer and narrower than a standard king size bed, giving couples more room to move around. The extra length allows taller people to sleep comfortably without having the feet hang off the edge of the mattress.
  • More affordable: California king size beds are typically cheaper than standard king size beds, making it an affordable option for couples on a budget. Additionally, they’re easier to transport due to their slightly smaller dimensions.
  • Subtler look: Because of its narrower design, a california king size bed can appear less bulky in comparison to other types of beds. This makes it ideal for those who prefer a sleeker look for their bedroom.

The advantages make this type of bed an attractive choice for many couples who seek additional comfort and space. 

However, there are also some disadvantages that should be considered before investing in this type of mattress.

Disadvantages Of A California King Size Bed

It’s a tale as old as time – couples trying to decide what bed size is best for them. 

The California King size bed has long been touted as the perfect bed size for couples, but it’s not without its drawbacks. 

Let’s take a look at some of the disadvantages of this popular choice.

Though it may seem like a dream come true, the California King size bed can be quite a hassle. 

For starters, they typically don’t fit through doorways easily and require special maneuvering to get in place. 

Plus, finding sheets and other accessories for this odd-sized mattress can be tricky and expensive. And if you’re on a tight budget, buying two smaller mattresses could end up being more cost-effective than one big one.

Lastly, the California King size bed isn’t always ideal for couples who want to share their sleeping space. 

With an extra-long length but slightly narrower width than the traditional King size bed, cuddling up with your significant other may prove difficult. 

Even if you opt for an adjustable base that lets you raise or lower either side of the mattress separately, it still may not provide enough room for two people to comfortably snuggle up together.

Without a doubt, there are tradeoffs to consider when deciding between different types of beds – especially when it comes to couples sharing sleeping space. 

So before settling on a California King size bed, do your research and consider all factors carefully to make sure it’s really the right fit for your needs.

Tips For Choosing The Best Bed Size For Couples

It can be a daunting task to choose the right bed size for a couple. The wrong choice could mean not enough space, or too much of it. 

Figuratively speaking, finding the right bed size is like finding the middle ground between two points; a balancing act that requires careful consideration of what works best for both partners.

When selecting a bed size for couples, there are several factors to consider. 

First and foremost, it’s important to check the available space in their bedroom and determine which size fits comfortably in the room without overcrowding it. 

Next, couples should consider how they sleep – do they cuddle together or prefer having more room? A third factor is whether both parties are comfortable with sharing a single mattress or would rather have separate beds.

Knowing these things can help couples make an informed decision when choosing their bed size. 

It’s also important to look into alternatives such as split king beds or bunk beds if neither party wants to compromise on space and comfort. 

Instead of settling for something that doesn’t work for them, couples should explore all their options before making their final choice.

Ultimately, finding the perfect bed size comes down to understanding each partner’s needs and preferences while taking practical considerations into account. 

Alternatives To Queen, King, And California King Sizes

The best of something isn’t always the biggest. When it comes to finding the ideal bed size for couples, there are a few alternatives to consider instead of the conventional queen, king, and california king sizes. As the old saying goes: ‘good things come in small packages’.

When sizing up bed options for couples, it’s good to bear in mind that comfort is key. 

A full-size bed may be surprisingly spacious for two people if you prioritize coziness over a lot of legroom. 

Additionally, full-size beds often take up less space in a bedroom than a queen or larger mattress would.

If you’re looking to save money on a new bed without sacrificing quality and support, twin XL beds are an excellent option. 

Though they don’t offer quite as much width as a full-size mattress does, two individuals can still sleep comfortably side by side on a twin XL bed with around 38 inches of width per person – which may be more than enough room depending on your sleep preferences.

So while queen, king, and california king sizes are popular choices among couples shopping for beds, there are other alternatives worth considering if they don’t fit your budget or living space. 

From full-size beds to twin XL mattresses with plenty of room to spare – couples have many options at their disposal when selecting an appropriate bed size for their needs.”

Frequently Asked Questions

What Is The Best Bed Size For Two People Of Different Heights?

Couples come in all shapes and sizes, and so do beds. Finding the best bed size for two people of different heights can be a challenge.  When one partner is significantly taller or shorter than the other, it’s important to consider their needs when selecting a bed size.

Take my friends Jack and Jill, for example. Jack towers over Jill at 6’2” while she stands at 5’6”. They were shopping for a new mattress and had to figure out which size would work best for their situation. 
They considered their height difference and opted for a King-size mattress instead of a Queen-size. The extra length was perfect for them both – Jack could stretch out his legs without feeling cramped, while Jill’s feet didn’t hang off the edge of the bed anymore.

The right bed size can make all the difference when two partners have different heights.  A King-size mattress offers ample space to accommodate two people comfortably regardless of height difference, making it an excellent choice for couples like Jack and Jill who don’t fit into traditional sizes. 

Couples should always take their individual needs into consideration when choosing a mattress size – ultimately, comfort is key!

How Much Space Do Couples Need In Bed To Sleep Comfortably?

Studies show that couples need at least 30 inches of space between them to sleep comfortably. Research reveals that most couples prefer a queen size mattress for sleeping together, as this allows enough room for both people without feeling cramped.

When looking for the best bed size for two, comfort is key. Here are four important factors to consider: 

1. Size: The width and length of the bed should be long enough and wide enough to accommodate both people’s needs. 
2. Support: The mattress should provide adequate support, cushioning and comfort so that both partners can rest peacefully throughout the night. 
3. Height: Couples should also factor in their respective heights when selecting a suitable bed size. 
4. Budget: Selecting a mattress within your budget is also an important consideration when purchasing a new bed or mattress for two people.

A queen size mattress provides plenty of space while still fitting into many bedrooms, making it an ideal choice for couples who are looking to share a bed without compromising on comfort or space. 

Plus, with pillow top mattresses becoming increasingly popular among couples, there is sure to be something out there that suits all budgets and preferences! 

So, when it comes to finding the perfect bed size for you and your partner, make sure you take into account all of these factors before making your decision – it could make all the difference between a good night’s sleep and a restless one!

Are Split King Beds A Good Option For Couples?

Split king beds may be the ideal sleeping solution for couples. 
Not only do they provide plenty of space – each person is able to have their own mattress, complete with individual head and foot adjustments – but they also offer a sense of comfort that other bed sizes can’t match.

The theory behind split kings is that since two mattresses are used rather than one, couples can enjoy a more restful sleep without disturbing each other. 

The mattresses are designed to fit together seamlessly and provide an even sleeping surface with no gaps or lumps. This means no more fighting over who gets to be the “little spoon”!
Additionally, split king beds come with many features such as adjustable bases, massage settings, and under-bed lighting that can make any bedroom feel like a luxury suite. 

With so many benefits, it’s easy to see why this type of bed is becoming increasingly popular among couples. 
TIP: Consider buying a mattress protector for your split king bed to help keep it in top condition. This will help prolong its life and maintain its luxurious feel for years to come!

Are Adjustable Beds A Good Option For Couples?

Adjustable beds offer couples a unique sleeping experience. With the ability to adjust the bed to different angles and heights, it’s easy for two people to find a comfortable position. 
Plus, adjustable beds often come with features like massage settings and USB ports, providing extra relaxation and convenience.

The biggest benefit of an adjustable bed is that each partner can independently control their side of the bed. 
This allows them to customize their own comfort level without disturbing their partner. 

It also makes it easier for tall people who sleep with shorter people as they can raise their head and feet while keeping their partner’s side flat.

Adjustable beds can be expensive but they are well worth the investment if you’re looking for a comfortable sleeping experience that won’t disrupt your partner. 

They come in a variety of sizes so finding one that fits both partners should be easy too. All in all, adjustable beds offer many benefits for couples who want more out of their sleep time.

What Is The Best Mattress For Couples?

When it comes to bedroom bliss for couples, choosing the right mattress is a must. So, what is the best mattress for couples? It’s as simple as two peas in a pod. A high-quality mattress should provide adequate support and comfort for both of you. 

It should also be able to accommodate variations in body weight and size, so that both partners can enjoy a sound night’s sleep. Memory foam or hybrid mattresses are often preferred by couples because they help reduce motion transfer and conform to each individual’s body shape.

It’s worth investing in a mattress that will last; a good quality one should last up to 10 years or more. And if budget isn’t an issue, there are plenty of luxurious options available on the market that offer extra features such as cooling technology and personalized comfort settings. 

Ultimately, finding the right mattress is all about personal preference – but with these few tips, you’re sure to hit the sweet spot for your sleep setup!

Conclusion

A good night’s sleep is essential for a healthy relationship. 

The size of the bed is a major factor in achieving this. For couples, choosing the right bed size can be tricky but it doesn’t have to be.

A split king bed offers both partners plenty of space to spread out, while adjustable beds provide personalized support to both people. 

When it comes to mattresses, couples should look for one that suits their individual needs and preferences.

Ultimately, comfort and space are the main considerations when it comes to selecting the best bed size for couples. 

A shared bed is a symbol of togetherness and an opportunity to create long-lasting memories with your partner. 

As long as you keep this in mind when making your decision, you’ll be sure to find the perfect bed size for you and your loved one.

Are White Blackout Curtains Effective At Blocking Light

Are White Blackout Curtains Effective At Blocking Light

Do white blackout curtains work? Are they as good as the black versions? We answer these questions and more.

When light is disruptive to sleep white blackout curtains can block out all light solving potential issues like like insomnia and fatigue. They are designed to keep light outside where it belongs. 

So if you’re looking for a way to get better rest, read on!

Overview Of White Blackout Curtains

1 47

A dark night, a lightless room. It’s an image that can evoke a sense of peace and security; something we all seek out in the chaos of everyday life. 

White blackout curtains could help us achieve this sense of tranquility, but how effective are they at blocking out light?

We’ll start by examining the composition and design of white blackout curtains. The material is usually thicker than regular fabric and lined with a thick layer of insulation to block out light from entering through any cracks or crevices. 

They feature a rod-pocket header for ease-of-use, allowing them to hang flat against a window frame, keeping out drafts and sealing in warmth.

The benefits of white blackout curtains don’t stop there. Not only do they block out intrusive light, they also have soundproofing properties, as well as insulating against heat and cold air. 

What’s more, they provide privacy without compromising on style – many come in a variety of colors and patterns so you can find the perfect look for your home.

So what does this mean for those seeking respite from the world outside? White blackout curtains offer an attractive solution that not only blocks out light but also helps keep the temperature regulated while providing additional privacy and soundproofing benefits – all without sacrificing aesthetic appeal.

Types Of White Blackout Curtains

Unfortunately, it turns out that not all white blackout curtains are created equal. There are different types available with varying levels of effectiveness in blocking out light. 

So if you’re looking for total darkness, you’ll have to pick the right type for your needs.

The most common types of white blackout curtains are thermal-backed, insulated and sheer polyester. 

Thermal-backed curtains provide the best insulation against heat and cold while also providing complete darkness when closed. 

Insulated curtains are great for keeping in warmth during winter months but can let some light through if they aren’t thick enough. 

Sheer polyester curtains provide privacy while still allowing some sunlight in. 

Each has its own advantages and disadvantages so you should choose carefully depending on what you need from your white blackout curtain.

No matter what type of curtain you choose, proper installation is key to ensuring maximum effectiveness at blocking light.

Installation Of White Blackout Curtains

1 22

Installation of white blackout curtains is key to their effectiveness. 

They need to be hung properly, and it’s not difficult. 

First, measure the window for the right size of curtain. 

Next, hang the panel on the rod or track using rings or clips. Lastly, adjust the curtain to fit tightly against the window frame.

It’s important to check that all fastenings are secure, and that there are no gaps between the curtains and wall or window frame for light to get in. 

If there are any gaps, use a sealant or draught excluder to close them up.

Also, make sure that all parts of the curtain and its attachments are firmly fixed in place – if something needs replacing, such as a broken hook or ring, do this quickly and easily with an appropriate replacement part. 

Following these steps will ensure white blackout curtains cover windows securely and effectively.

Factors Affecting The Effectiveness Of White Blackout Curtains

White blackout curtains are a great option for anyone looking to block out light. But there are many factors that can affect their effectiveness. 

Let’s look at what some of those factors might be.

The type of fabric used is an important factor in determining how much light the curtains block. 

Thick, heavy fabrics are the most effective at blocking light, while lighter materials will let more light through. 

Sheer fabrics don’t do much to reduce light and should be avoided when choosing blackout curtains.

The color of the curtains also plays a big role in how effective they are at blocking out light. 

White is one of the best colors to choose if you want maximum darkness as it reflects more light than other colors, allowing almost no sunlight to pass through.

But even with white blackout curtains, there may still be some residual light coming through due to gaps between the curtains and window frame or inadequate installation methods. 

Taking extra steps to ensure proper installation and closing any gaps will help maximize the effectiveness of your white blackout curtains.

Tips For Maximizing The Effectiveness Of White Blackout Curtains

Research suggests that over 50% of people suffer from poor quality sleep due to too much light in their bedroom. 

White blackout curtains are a popular option for blocking out excess light and improving sleep quality. Here are seven tips to maximize the effectiveness of white blackout curtains:

  1. Installation: Hang the curtains as close as possible to the window frame, with little or no gap at the sides. This will reduce any potential leakage of light through the sides.
  2. Fabric: Look for thick blackout fabric with a tight weave and high thread count, as this will be better at blocking out light. Additionally, use interlining (a layer of insulation between two layers of fabric) for extra protection against seepage of natural light into your room.
  3. Lining: Lining your curtains with an opaque material such as velvet or flannel is also highly effective at preventing any additional light from entering your bedroom.
  4.  Accessories: Consider investing in curtain accessories such as tiebacks, weights or magnetic strips to make sure that there are no gaps when you draw them closed. You could also add door snakes or draft stoppers along the bottom to ensure complete darkness when you’re trying to get some shut-eye!
  5. Seams: If choosing ready-made curtains, look for ones without seams which can let in unwanted light and ruin your chances of getting a good night’s rest.
  6. Darkening Agents: Applying spray-on darkening agents like grommet shields or drapes made from heat-blocking fabrics can help reduce sunlight penetration even further – they can make all the difference!
  7. Color: While white is traditionally thought to be one of the best colors for blocking out light, darker shades such as navy blue or black can also be very effective if used correctly and combined with other strategies mentioned above such as lining and accessories.

These seven tips should help you get the most out of your white blackout curtains so you can make sure you get those all-important eight hours!

Frequently Asked Questions

How Much Light Do White Blackout Curtains Block?

White blackout curtains are popular for blocking out light. So how much light do they block? Light can be measured in lux, the unit of measure of illumination. White blackout curtains are designed to block 100% of light, and studies show that they can reduce up to 99% of outside light when properly installed.

These curtains have multiple benefits. They not only protect furniture from fading caused by UV rays and provide sound reduction, but they also promote a better sleeping environment. Plus, they’re energy efficient, helping keep rooms cooler in summer and warmer in winter.

White blackout curtains can be an effective way to reduce or eliminate light from entering a room.

Are White Blackout Curtains Effective For Soundproofing?

White blackout curtains may be effective at blocking light, but are they as effective for soundproofing? This question deserves a closer look.

Soundproofing requires a much denser material than what’s used in light-blocking curtains. The fabric of white blackout curtains is usually thin and lightweight, so it won’t adequately block noise from entering the room. A thicker material such as heavy velvet or layered drapery panels would be more effective.

However, if you’re looking for some extra sound insulation, you could always add extra layers of blackout curtains to your windows. You’ll still get the benefit of light-blocking fabric, and with enough layers, you might see an improvement in sound dampening too.

Can White Blackout Curtains Be Used In Any Type Of Room?

White blackout curtains have become increasingly popular for creating a dark, peaceful atmosphere in any type of room. But what exactly can these curtains do? Can they be used to create a relaxing environment in any space or are they only good for certain purposes?

To answer this question, it is important to understand the power of white blackout curtains. They are capable of blocking out light and sound, making them ideal for any room that requires extreme darkness or silence. 

As such, these window treatments can be used in bedrooms, home theatres, nurseries – anywhere peace and quiet is desired.
The list of benefits that come with using white blackout curtains goes on and on: 

1. They keep your home cool by reflecting sunlight 
2. They help reduce noise pollution from outside sources 
3. They provide privacy when needed -They add a stylish touch to any room’s décor 
4. They can give you peace of mind knowing your space is secure

White blackout curtains offer the perfect combination of style and functionality that no other window treatment can match. Whether you need complete darkness or just extra privacy, they will provide just the right amount of coverage while adding a touch of elegance to your space. With white blackout curtains, anyone can create the perfect atmosphere in their home without sacrificing beauty or comfort.

Are White Blackout Curtains Fire Resistant?

What a paradox it is – blackout curtains that are meant to keep out the light, but can’t protect against fire! Wouldn’t it be great if these curtains could do both? 

Let’s explore what we know about white blackout curtains and their fire resistance. First off, the fabric of these curtains is usually a polyester or cotton blend. While this material is known for its ability to block out light, it doesn’t stand up very well against fire. Here’s why:

1. Polyester and cotton blends are highly flammable 
2. The coating to make them black out sunlight is also flammable 
3. They don’t have any extra protective layers like other fire-resistant fabrics 
4. They don’t come treated with any kind of flame retardant chemicals 
5. Their thickness makes them more susceptible to catching on fire quickly

So as you can see, white blackout curtains aren’t very good at protecting from fire. You need something else if you want to be safe from an accidental blaze in your home or office. 

Seek out materials that offer flame retardant protection or even those designed specifically for fire safety. Your family will thank you later!

Conclusion

White blackout curtains can be a great addition to any room. They are an effective way to block out light and sound, and they can also help with fire safety. 

All in all, white blackout curtains have a lot of advantages. They are relatively inexpensive and easy to install, making them a great choice for anyone looking to block out light or sound. 

Additionally, they work well in any type of room since they come in so many sizes and shapes. Finally, the fact that they are fire-resistant makes them even more appealing.

Overall, white blackout curtains are a great solution for those who want privacy or more darkness in their homes. 

Their effectiveness at blocking both light and sound make them an ideal choice for anyone looking for an easy way to improve their home’s ambience. 

Plus, with their fire-resistant properties, one can rest assured knowing that their family is safe from danger. So why not give these versatile curtains a try?

Why Does My Bed Move Away From The Wall – How To Fix It

Why Does My Bed Move Away From The Wall

Have you ever woken up to find your bed pushed away from the wall? It can be a frustrating experience. You may have asked yourself, “Why does my bed move away from the wall? How do I fix it?” 

The answers are simple: your bed is moving because of slippage and faulty connections. 

Fortunately, you can easily remedy this situation and keep your bed where it belongs.

First, learn why your bed moves away from the wall. If bolts or screws that connect pieces of the frame together have come undone over time, it can resulting in more movement than desired. To fix simply tighten them up. 

Also if you use furniture pads on each post it can reduce slippage and add friction between your floor and the frame itself.

With just a few steps, you can make sure that your bed stays where it should be!

1. Identifying The Causes Of Bed Movement

1 41

It’s a mystery why our beds sometimes act as if they have a mind of their own. Frustratingly, the bed may move away from the wall for no apparent reason. 

To make sure this doesn’t happen again, let’s investigate what could be causing it.

First, we’ll look at the underlying causes of bed movement. 

It could be due to uneven floors or inadequate support from the bed frame. 

Maybe the casters underneath are worn out or loose, which can cause instability and sliding. 

Sometimes the bedding itself is too heavy and pulls against the wall when you turn over in your sleep.

The next step is to examine the bed frame closely and ensure that all parts are secured properly. 

Check that all screws and bolts are correctly tightened so everything sits firmly together. 

Make sure any castors are locked in place and not just spinning freely around on their own – this could be another reason why your bed slides away from the wall. 

Additionally, inspect any damaged parts of the frame that need replacing or repairing so you don’t experience further issues in future.

2. Examining The Bed Frame

Coincidentally, examining the bed frame is the second step to fixing it. In this step, we’ll look for any loose parts that may be causing it to move away from the wall. 

To start, check out the connection points between the headboard, footboard and side rails. 

We want to make sure they’re all tightly connected and there’s no sign of wear or tear on them.

Next, inspect all four legs of the frame thoroughly. 

Look for any signs of damage or weakening, such as scratches or splinters in the wood. If you find that one or more of them are loose, tighten them up with a wrench and see if that solves your problem.

Finally, check out any metal components like screws and bolts that join different sections of the bed together. 

These should be tightened as well if needed. 

If these don’t seem to be helping to keep your bed in place, then it’s time to consider what’s happening with the floor surface beneath it.

3. Considering The Floor Surface

2 42

It’s estimated that as much as 5% of a bed’s movement away from the wall is caused by irregularities in the floor surface. 

This can be due to uneven flooring, or even objects lodged between the bed frame and the floor. 

Considering this factor is an essential part of fixing a bed that won’t stay near the wall.

First, it’s important to check if there are any objects beneath the bed frame, such as books or toys. 

Even small items like these can cause enough resistance to push the bed away from where you want it. If you find items, take them out and then try moving your bed around again.

Next, check for lumps or bumps in your carpet or hardwood flooring. 

You might need a flashlight to help see these imperfections more clearly, and then use a ruler to measure their size. 

If necessary, you can purchase some self-levelling compound which should help even out any bumps or dips in your floor surface.

Now that this step is taken care of, next we’ll look at inspecting wall anchors…

4. Inspecting Wall Anchors

Take for example the case of a bed that moved away from the wall. To fix this issue, it is important to inspect the wall anchors.

The first step is to ensure that the wall anchors are compatible with the type of wall in your bedroom. 

This will determine if they can support the weight or not. 

If they do not, then they need to be replaced with anchors that are suitable for your wall type and of an appropriate size and strength level.

Additionally, it’s also important to make sure that the anchors are installed properly and securely into the wall. 

This means ensuring that each anchor is securely attached into the wall by using an anchor drill bit and hammering them in at an angle so they cannot come loose. 

Once secure, check that all screws are tightened so they won’t slip out over time.

Finally, you should double-check that all screws, bolts and other hardware used to attach your bed frame to the wall are tight and secure. 

If necessary, replace any missing or worn parts with new ones as needed in order to ensure a sturdy connection between your bed frame and your walls. 

With these steps completed, your bed should no longer move away from the wall when in use. 

Moving on to utilizing anti-slip mats…

5. Utilizing Anti-Slip Mats

3 37

A stitch in time saves nine. Taking some preventative steps now can help keep your bed from moving away from the wall in the future. 

Firstly, it is worth considering using anti-slip mats underneath the legs of your bed. 

These are especially useful if you have hardwood floors, as they will provide more grip and reduce any slipping or sliding that could occur. 

It’s also a good idea to check the existing mats for signs of wear and tear, and replace them if necessary. 

Secondly, consider positioning furniture straps around the bed frame and attaching them to the wall. 

This will help secure the bed in place and stop it from shifting when you sit or lie down on it. 

Make sure to use strong straps that are securely fastened to both pieces of furniture, and be sure to check them regularly for any signs of damage or wear.

Finally, take a look at any other objects that may be causing your bed to move away from the wall, such as chairs or bookshelves. 

If these items are too close to your bed frame, they could be pushing against it and causing it to shift away from the wall over time. 

Moving these items further away should help stop any further movement of your bed frame towards the wall.

6. Using Furniture Straps

Have you ever noticed your bed mysteriously moving away from the wall? It’s a strange and often overlooked issue, but it can cause a number of problems. 

To fix it, you’ll need to secure the bed to the wall. Here’s how:

First, take preventive measures. 

Utilize anti-slip mats under the bed legs and keep your floors clean and free of dust or debris. 

Place furniture straps on items like dressers and nightstands that might be pushing against the bed. 

Finally, make sure there aren’t any loose furniture parts or pieces that could be causing the problem.

Next, it’s time to secure the bed to the wall. This is an important step to ensure your bed stays in place. 

Try using heavy-duty furniture straps or mounting brackets with screws specifically designed for this purpose. 

You can also use wooden boards that run diagonally across each corner of your bed frame if needed.

Finally, check frequently for any signs of movement or slippage after taking these steps. 

If necessary, make adjustments or repeat them until you’re satisfied with the results – no more mysterious movements!

7. Securing The Bed To The Wall

“Necessity is the mother of invention.” Securing a bed to the wall prevents it from moving away and requires some creativity. 

The first step is to find an anchor point in the wall. If there are no studs, use wall anchors instead. 

Next, measure the distance between the headboard and the anchor point, then cut a piece of metal or wood to that length. 

Attach hardware to each end with screws. Finally, attach one end of the piece to the headboard with screws and the other end to the anchor point in the wall.

The next step is to utilize wedges and shims for additional security. 

Take measurements of both sides of the bed frame and then get pieces of wood that fit those measurements. 

Push them into place between floor and frame on both sides. Finally, drive screws through shims into bed frame for extra stability.

These two steps will secure a bed firmly against any wall, keeping it from moving away in even heavy traffic areas like hallways or dorm rooms. 

With these simple techniques, you’ll be able to enjoy your sleep peacefully throughout every night!

8. Utilizing Wedges And Shims

John noticed his bed slowly moving away from the wall each morning. He was perplexed by how it seemed to move without anyone touching it. 

To fix this issue, John decided to utilize wedges and shims.

Take the example of Cindy, who faced a similar issue with her own bed frame. To secure it to the wall, she took these steps: 

  1. Measure the space between the bed and wall
  2. Cut pieces of wood to fit in that gap
  3. Line them up with wood glue and attach them with nails
  4. Place wooden wedges or shims between the bed and the attached wood pieces.

In addition to wood wedges, foam shims can also be used to fill any remaining space between the wall and frame. To do so, Cindy followed this process: 

  1. Measure any remaining gap between the bed frame and walls
  2. Cut a piece of foam insulation that would fit snugly in that space
  3. Apply adhesive to both sides of the foam cutout
  4. Secure it in place using screws for further reinforcement.

These two methods proved effective for Cindy, allowing her to hold her bed firmly against the wall without further movement. John followed these same steps for his own bedframe, experiencing a successful end result as well.

9. Avoiding Common Mistakes

Placing a bed against a wall can be like constructing a bridge over troubled waters. It takes effort and precision to make sure that both sides are secure and stable. 

With the wrong steps, the bridge can crumble quickly, leaving you with an unwanted gap between your bed and wall.

So how can we ensure the bed stays close to its destination? By avoiding the common mistakes that might lead to it drifting away from the wall. 

Like all journeys, preparation is key here – knowing what not to do is just as important as knowing what should be done.

First, check for any obstructions behind the bed – this could cause it to lean away from the wall once in place. 

If there are any loose objects such as wires or cables, secure them so they don’t move around while pushing the bed against the wall. 

While doing this, take extra care not to push down too hard on one side of the bedstead; this could cause it to tilt away from the wall when you least expect it.

Making sure these details are taken into account will help keep your bed close to its desired position. 

And with careful consideration of these small things, you’ll be able to enjoy a good night’s sleep without worrying about your bed moving away from the wall!

10. Choosing The Best Solution

Picking a solution is like climbing a mountain – it can be daunting, but the view from the peak is worth the struggle. It’s important to take time to find the best fix for your moving bed.

First, inspect your bed and frame for any signs of damage or wear. 

Check if there are any loose screws or pieces that need tightening. If you’ve recently moved your bed, there may be something blocking it from staying in place.

Once you’ve identified any potential problems, you can decide whether you should attempt a DIY repair or hire a professional. 

If you’re confident in your skills, try out simple fixes such as securing your bed frame with screws or adding shims underneath to level it out. 

But if the issue looks too complicated, don’t hesitate to call in an expert who can help you get the job done right.

Making sure your bed stays put shouldn’t be taken lightly – if not done correctly, this could lead to serious consequences down the road. 

Take time to look for the best option and act accordingly for optimal results.

Frequently Asked Questions

Is It Necessary To Secure The Bed To The Wall?

Have you ever woken up to find your bed moved away from the wall? Have you ever wondered why this is happening, and if it’s necessary to secure the bed to the wall? Securing the bed to the wall is an effective method for avoiding this issue.

First, it’s important to understand why a bed moves away from the wall in the first place. If a mattress has hollow spots or dips, it will move away from the wall due to gravitational forces. 
Additionally, loose floor boards can cause beds to shift when someone sleeps on them. In either case, securing the bed to the wall can eliminate this problem.

Using wedges or shims is one way of securing a bed frame to the wall, but they are only temporary solutions. A better solution is to drive wood screws into both sides of each corner of the frame and into studs behind the wall. 

This will provide more stability and keep your bed from shifting out of place. It’s also easy enough for most people with basic DIY skills to do themselves with only minimal tools and materials needed.

Securing your bed frame to studs in your walls will help keep your bed in place for years and give you peace of mind that it won’t move during sleep. 

Keeping your mattress supported properly also helps prolong its lifespan as well as improve comfort levels while sleeping. 
Taking these steps can ensure that you get a good night’s rest every night without worrying about waking up with your bed pushed away from the wall again.

Conclusion

It’s important to understand why a bed moves away from the wall. Weighing down bed frames is one way to stop it, but using furniture straps is a better solution. 

Anti-slip mats are safe for children, and wedges and shims can be used as a temporary fix until you decide on something more permanent. 

Securing your bed to the wall isn’t necessarily required, but if done correctly, can help prevent it from shifting in the first place.

It’s always a good idea to take preventive measures when it comes to furniture safety in your home. Like an old adage says: “An ounce of prevention is worth a pound of cure.” 

Taking the time to inspect your furniture regularly and being proactive about fixing any issues you find can save you time and headaches later on.

So don’t wait – get ahead of any potential problems with your furniture before they become bigger problems! 

Don’t put off until tomorrow what you can do today – take action now and keep your furniture secure where it belongs: against the wall!